Introduction
This is my practical guide to using Git and GitHub. I struggled a lot when I first started learning how to use Git, so these are all the things I wish I knew when I first started. This guide reflects my current workflow, but there definitely might be better ones (please let me know!). I hope this step-by-step story helps you manage your code better and helps you navigate version control.
This tutorial requires you to have signed up on GitHub and downloaded Git (there are plenty of other tutorials explaining how to do this). This tutorial also assumes you have basic knowledge of moving around using the command line. Good luck!
The Beginning: Your First Project
The first step is to create a repository on GitHub to contain all of your files. Think of this like a Google Drive folder - this is a place where you can upload all of your files in order to keep them up to date.
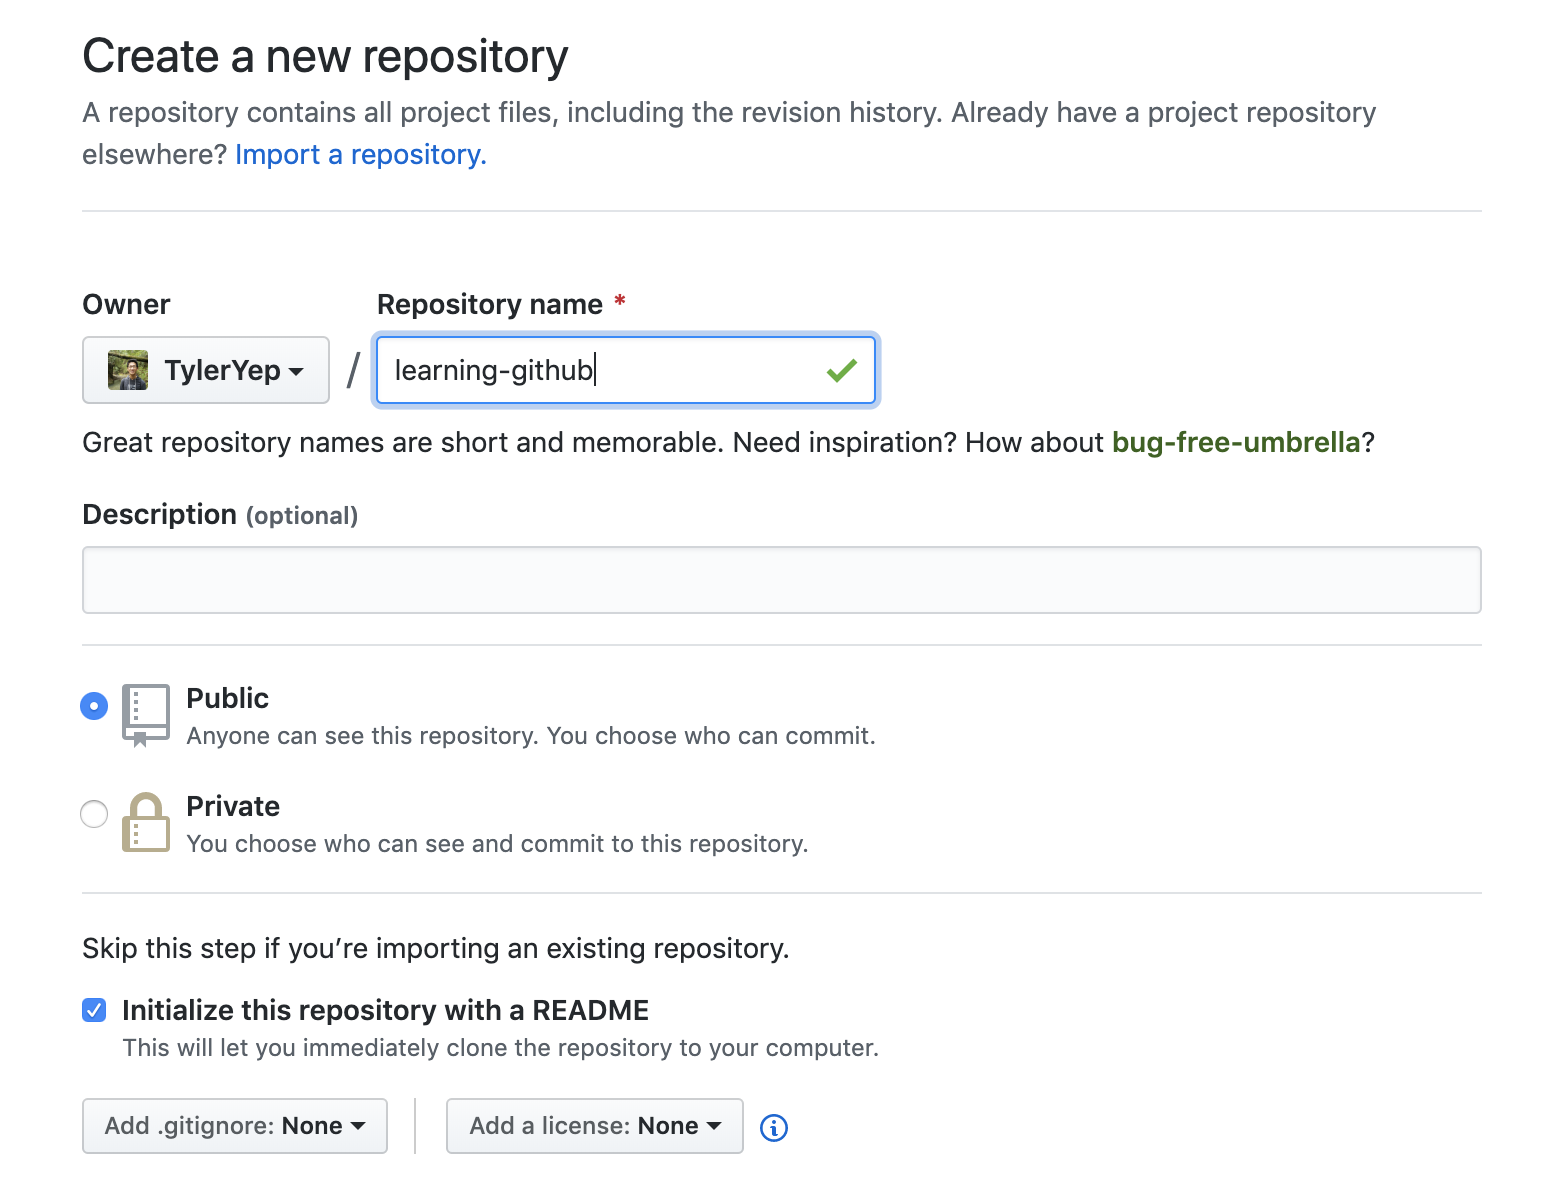 Make sure you select “Initialize this repository with a README”.
You will get to a landing page with your empty repository. The next step is to create a local copy of this repository on your local machine. Go to your command line and type:
$ git clone https://github.com/<YOUR USERNAME>/learning-github.git
If your repository is named differently, you can find the url on the repo homepage:
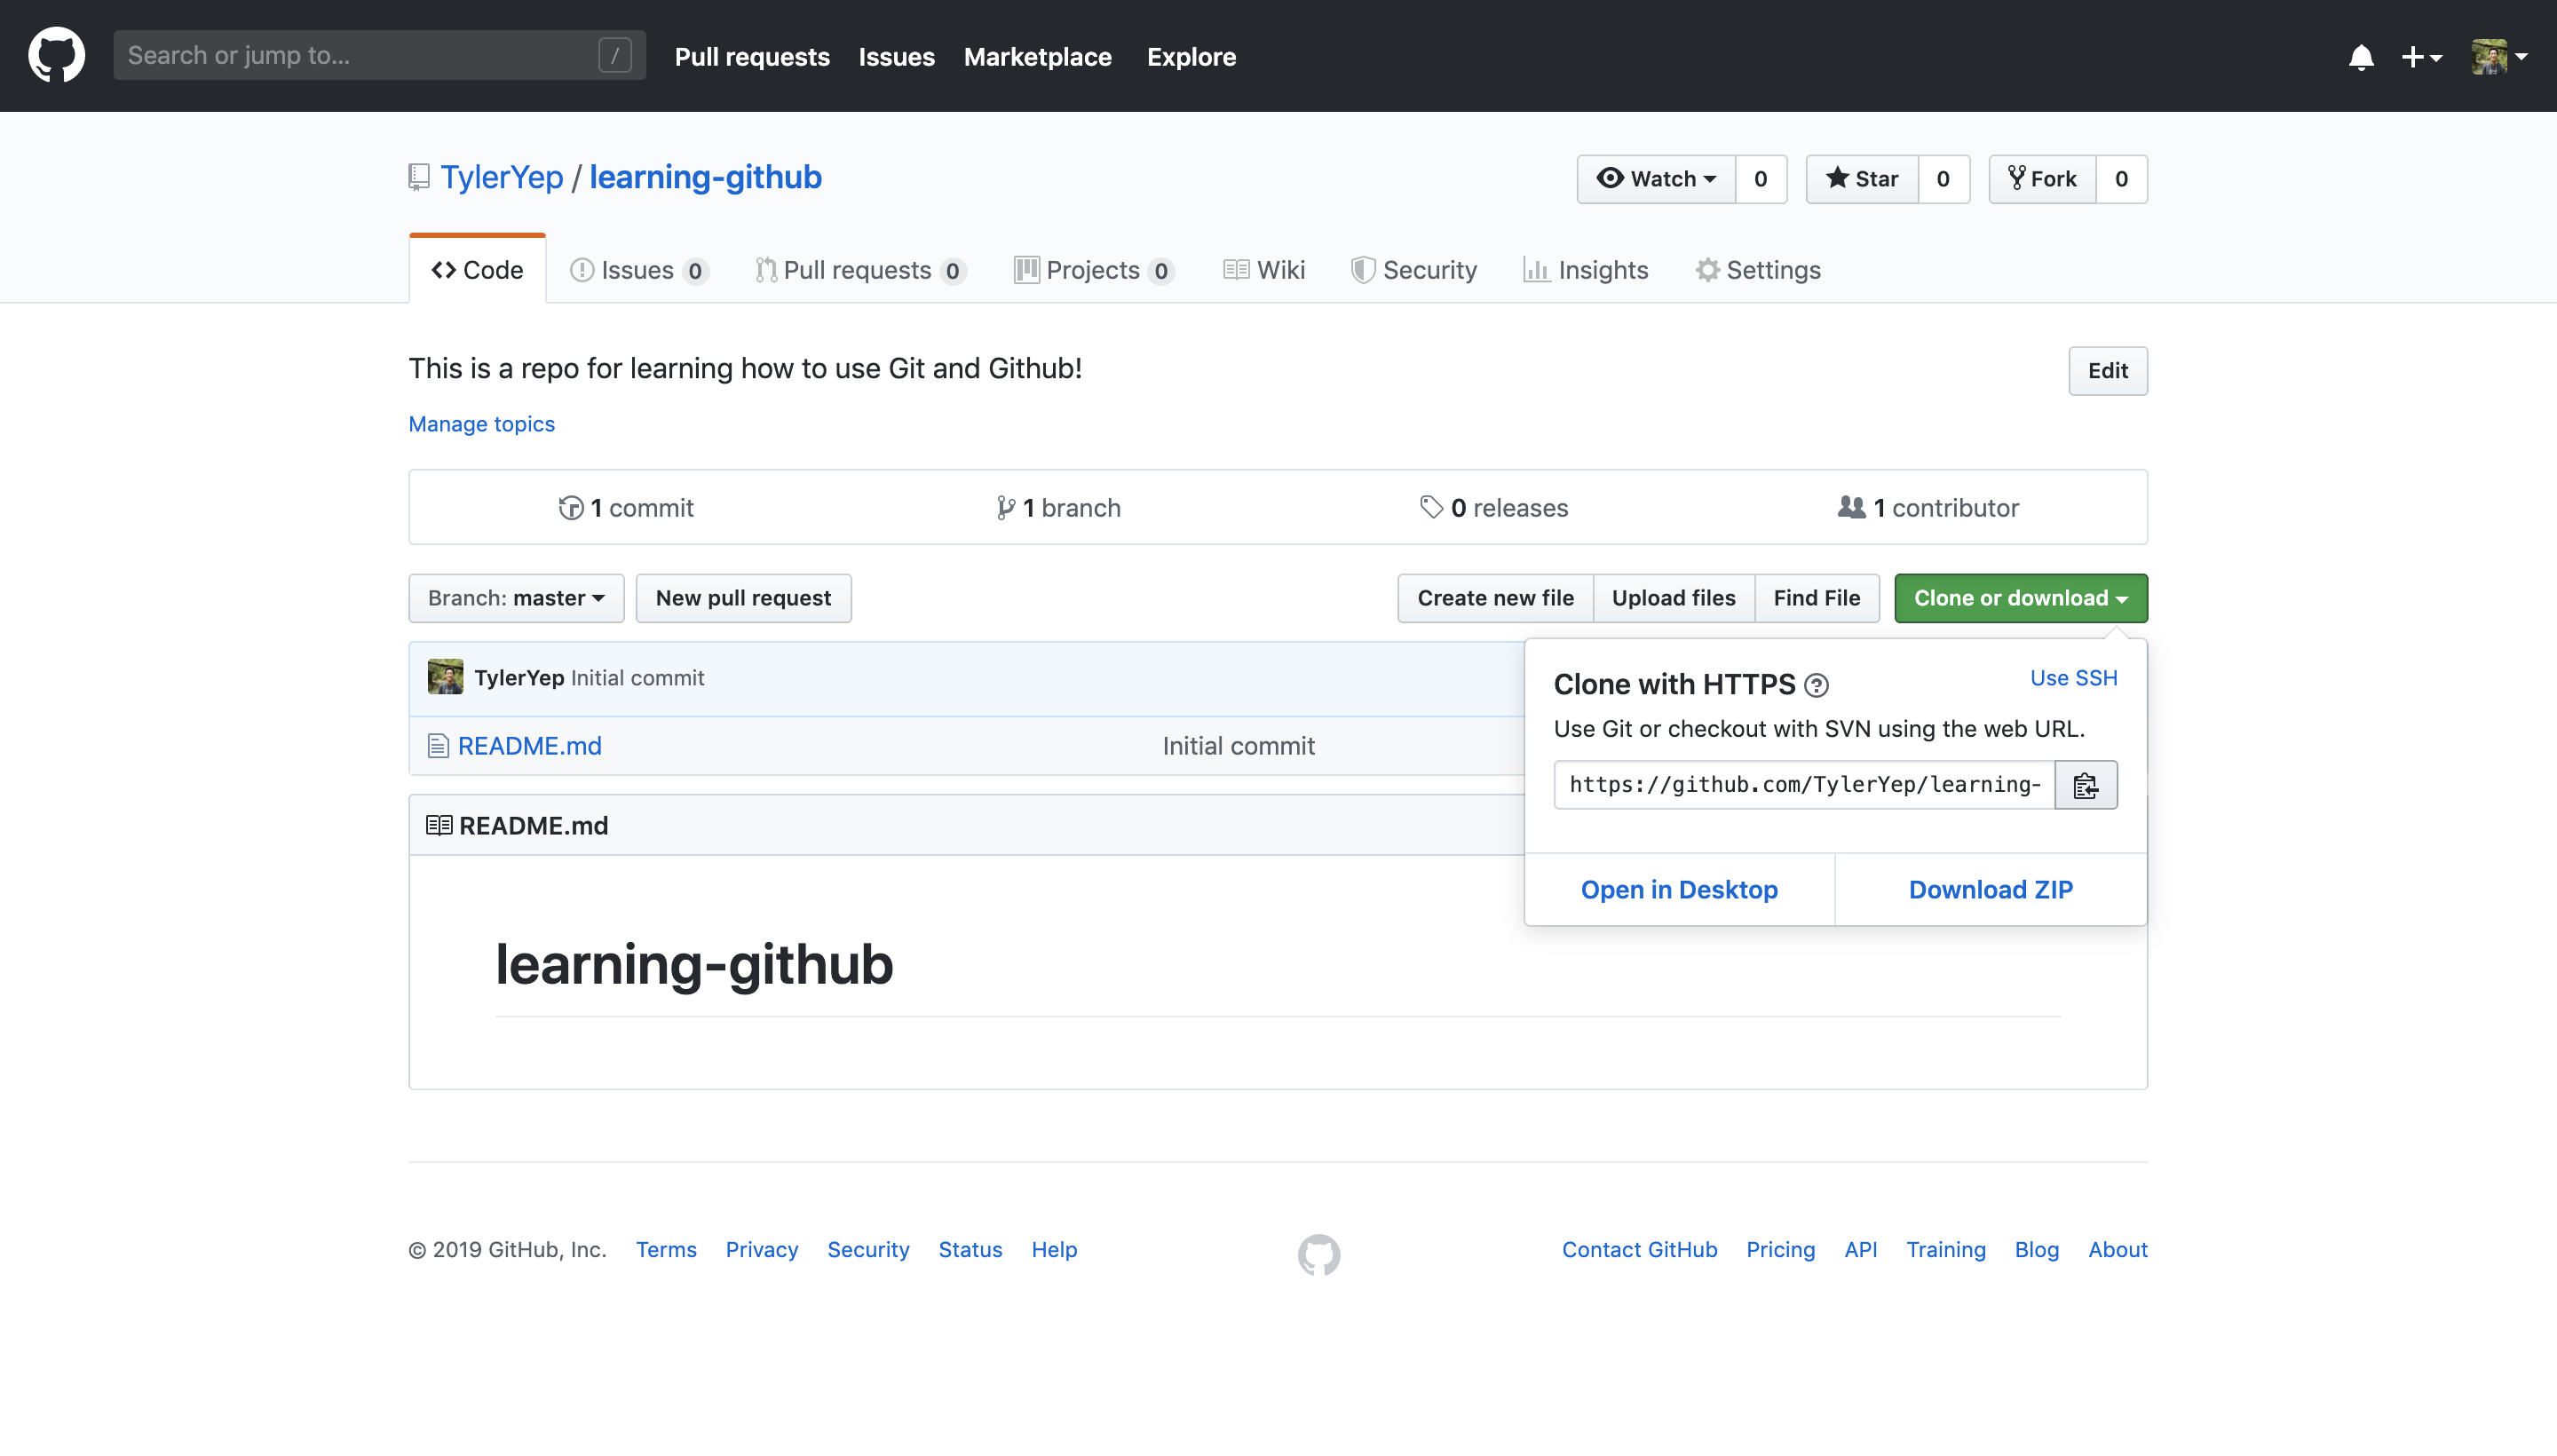 You can click the clipboard icon in order to easily copy+paste the repo url.
This will create a copy of the contents of the repository onto your computer. You should see a folder on your computer with a README.md file.
Now, an important distinction: there are now TWO copies of your files. One is the local version, which we will work on and make changes to. The other is an origin version, which exists on the GitHub servers. Once we make changes to the local copy, we will push it up to the GitHub servers to store in the origin.
 Quick diagram of origin vs local copy.
Making Changes
Let’s make some changes to our repository. Go make some changes to README.md and add some extra files to the folder. Now, let’s pretend we are now ready to save our work. First, let’s see an overview of our changes. In the command line, type:
$ git status
We should now see an overview like this. We can see the files we have modified/edited.
$ git status
On branch main
Your branch is up to date with 'origin/main'.

Changes not staged for commit:
  (use "git add <file>..." to update what will be committed)
  (use "git checkout -- <file>..." to discard changes in working directory)

	modified:   README.md

Untracked files:
  (use "git add <file>..." to include in what will be committed)

	otherfiles.txt

no changes added to commit (use "git add" and/or "git commit -a")
Now, we want to specify these are the files that we want to save our progress on. This is called making a commit, which basically means saving the differences between the previous version and the current version. Let’s add all of the current files to a staging area.
$ git add .
You can also add one file at a time: git add README.md; git add otherfiles.txt
$ git add .
$ git status
On branch main
Your branch is up to date with 'origin/main'.

Changes to be committed:
  (use "git reset HEAD <file>..." to unstage)

	modified:   README.md
	new file:   otherfiles.txt
This staging area contains all of the changes we want included in this commit. This is a helpful feature because we don’t necessarily want all of our changes to be included in the new version. Once we have finalized the staging area (which you can verify with another git status), we can make a commit with a commit message:
$ git commit -m "Add new features to the bork bork"
At this point, it’s a good idea to check that git status does not contain those changes anymore, and that typing git log shows the commit you’ve just made.
$ git log
commit e7d41bd330585a9f2640e0f153be828ff2fb000a (HEAD -> main)
Author: Tyler Yep <tyep@stanford.edu>
Date:   Sun Jul 21 01:49:54 2019 -0700

    Make changes to README and add otherfiles

commit 0ee09754a06287b652d550b2843e8b15d7518e6c (origin/main, origin/HEAD)
Author: Tyler Yep <tyep@stanford.edu>
Date:   Sat Jul 20 22:01:59 2019 -0700

    Initial commit
At this point, we’ve successfully made a commit, and are now ready to push our changes to the GitHub servers to save. We can use the following command to send our changes up to the GitHub servers.
$ git push
(Note: this command is an abbreviation for git push origin main. It is a good idea to type the entire command to ensure you push changes to the right place!)
After running this command, going back to the GitHub page for this repository should show your new commit!

Summary
If are working on a solo project and just want some basic version control, these steps should be all you need to get started. Every time you want to save a snapshot of your work, simply add to the staging area with with git add ., commit with git commit -m "example commit", and then push to GitHub with git push!
In the next part, we’ll go over techniques for pulling in changes in a larger project from your collaborators, and the concept of rebasing.